User Manual
![]() TOPBMS--Li-ion and LiFePo4 BMS 12S-16S Specification PDF.pdf
TOPBMS--Li-ion and LiFePo4 BMS 12S-16S Specification PDF.pdf
BMS 3D Drawings


![]()
Seperated Board

3D Drawing of Seperated Board :
![]() Separated BOARD -Dimension.rar
Separated BOARD -Dimension.rar


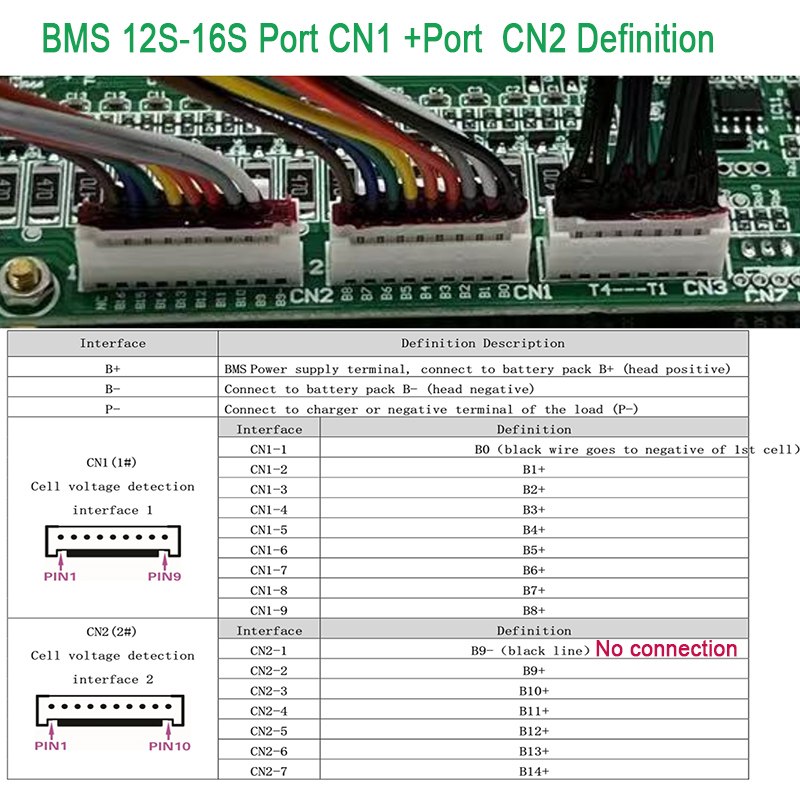
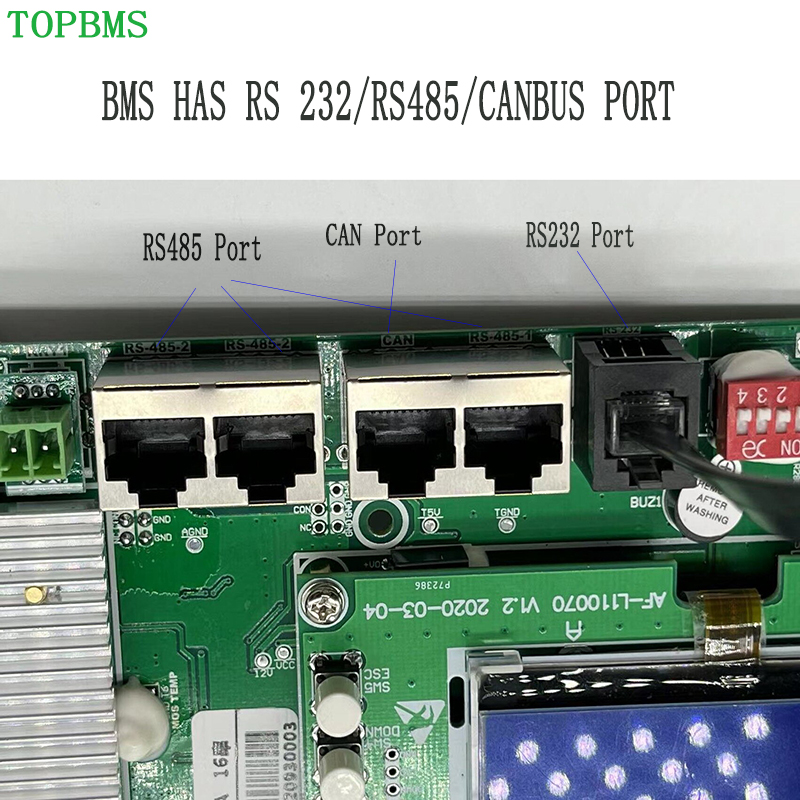
RS485/CAN Port Definition

For internal communication , please follow this diagram

For external communication , please follow this diagram

Maximun 16 BMS and 16 battery packs work in parallel

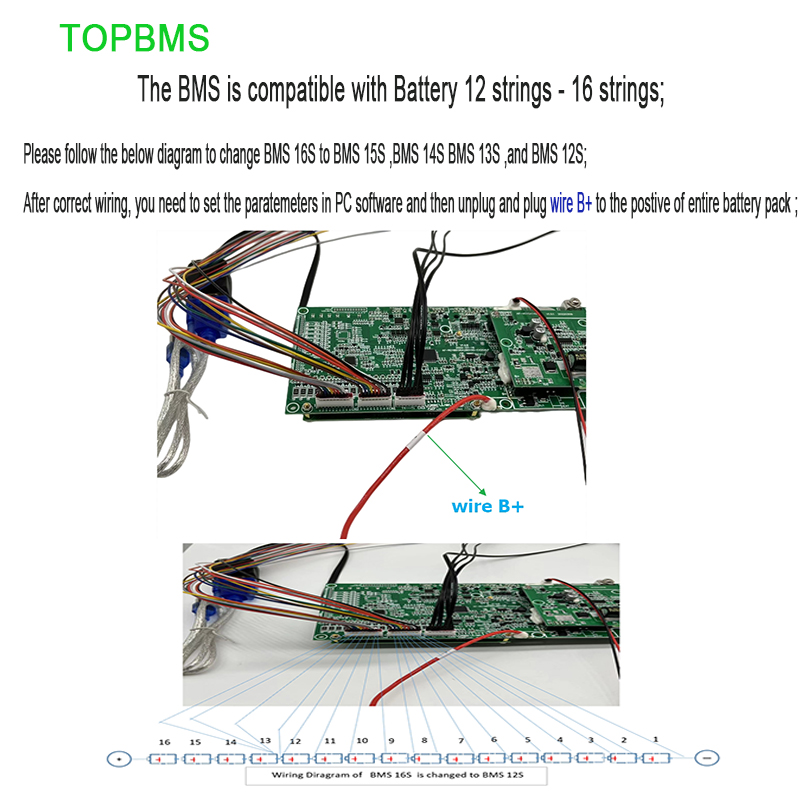
Wiring diagram of BMS 16S changed to BMS 15S ,BMS 14S , BMS 13S , please refer to the following diagram :


After you wires the bms , please adjust/ change the parameters VIA the PC computer when you change bms 16s to be bms 15S ,BMS 14s ....; please follow the below video
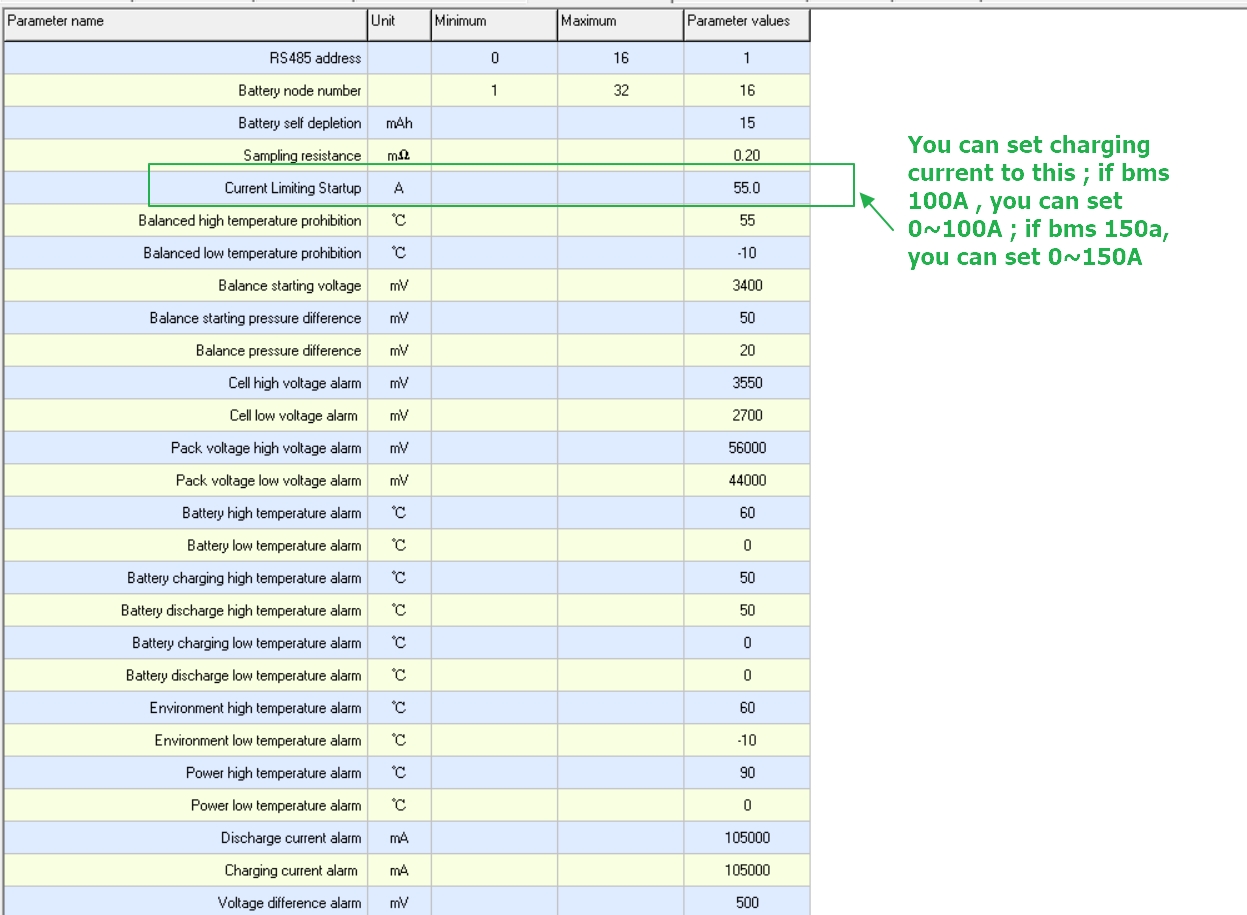
If you want to change the charging current , please change the setting of current Limiting startup

SOC Calibration
If the SOC isnot showed correctly , please take a complete cycly of dischagring and charging ; and then the SOC will be calibracted automatcally
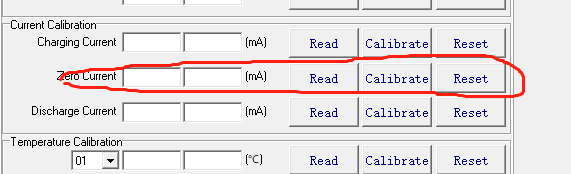
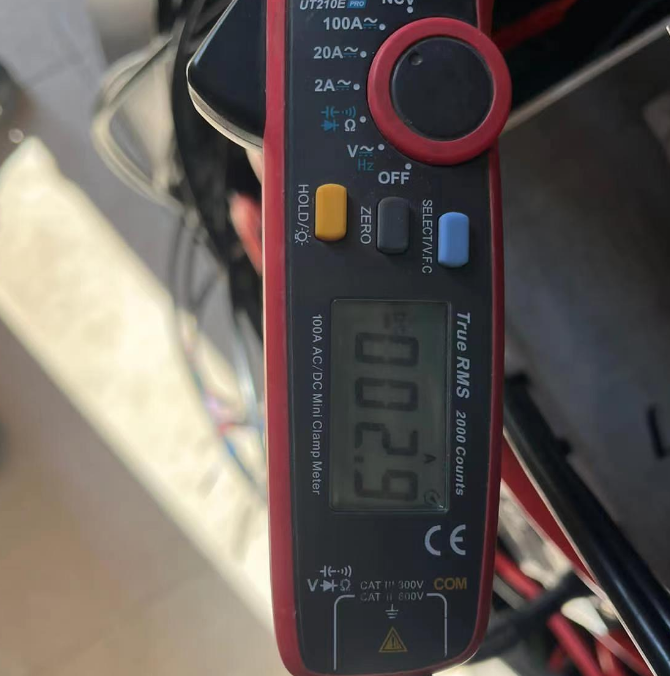
If the current is not showed correctly , please do current calibration like this :
Zero Current Calibration :
Step 1 : if BMS is disconnected to charger and load ,the current display show is not zero ; please do curren calibration in this way :
Please go to the page of "System Configuration" and then click "READ" and then click "RESET" ,finally click "CALIBRATION "
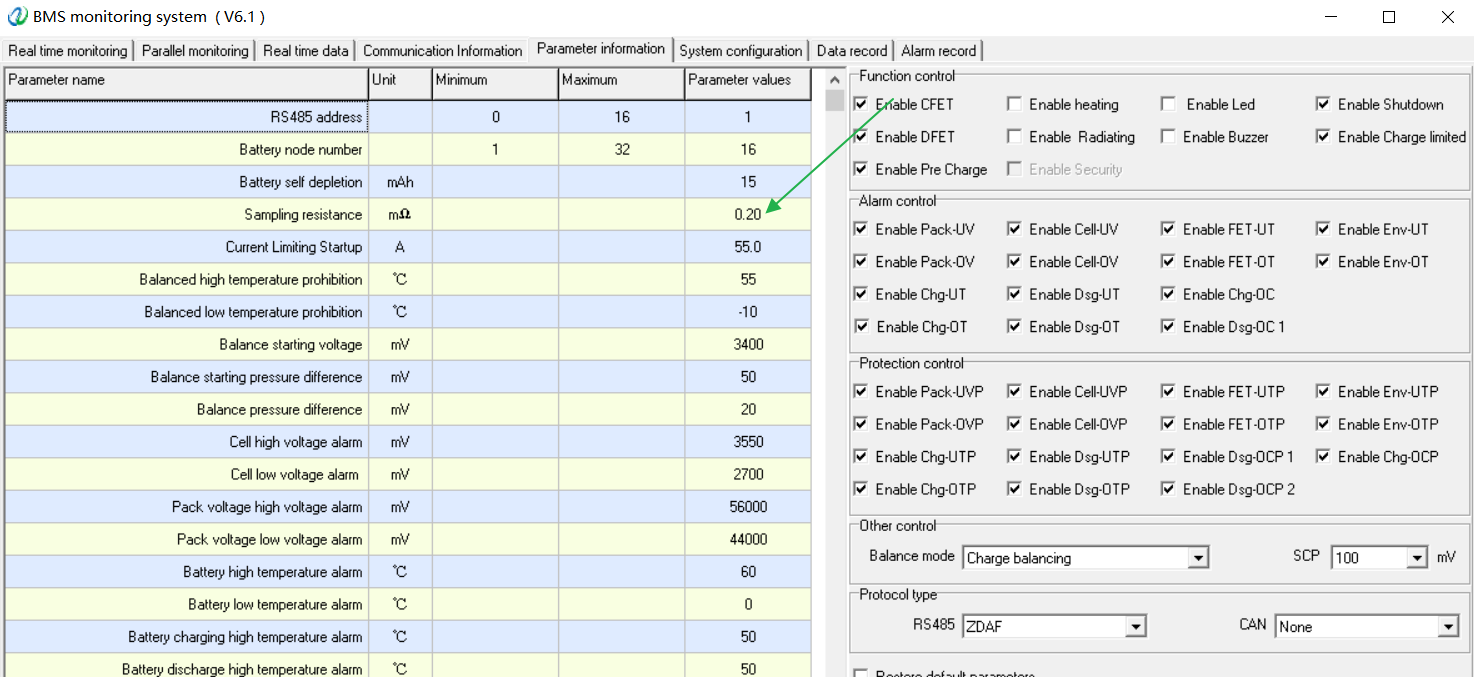
Current Calibration :
Current Calibration if the bms is connected to load and discharging current is not in line with actual discharge cuurent
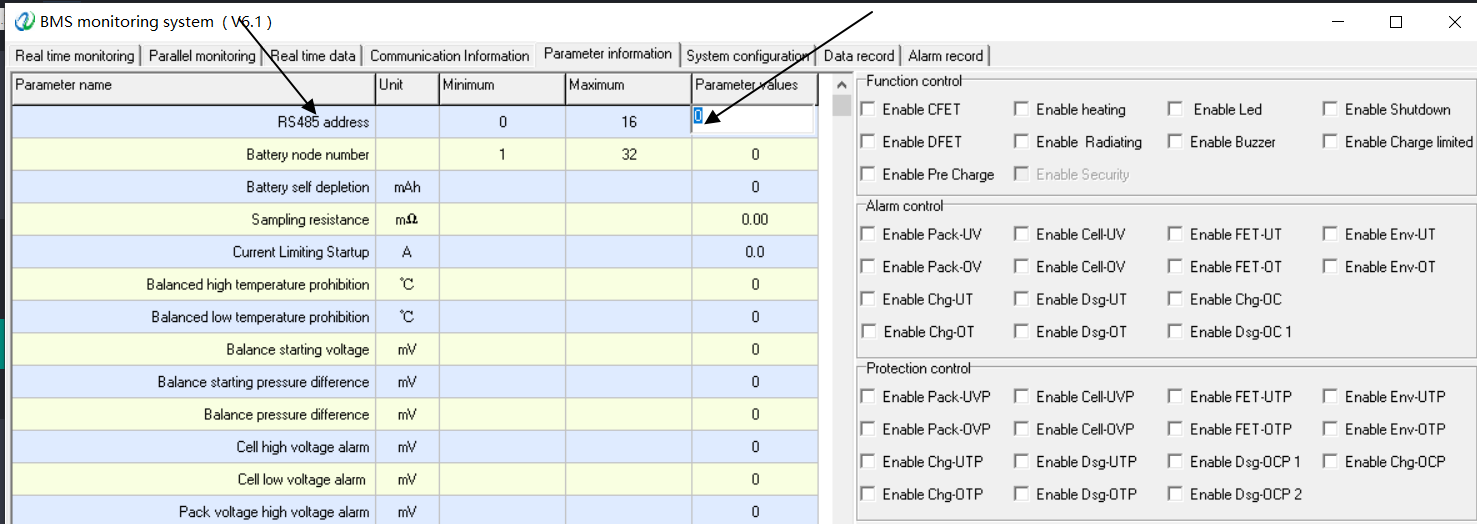
please go to the page of "Parameter Information" to adjust the sampling resistance ,see following ;
if You can change sampling resistor from 0.20 to 0.19, 0.18, 0.17….. gradually , the current will be changed to be larger until
Until the current the display shows is in line with the actual one
or if You can change sampling resistor from 0.20 to 0.21, 0.22, 0.23….. gradually,
the current will be changed to be smaller until the current the display shows is in line with the actual one
How to Set charging current :
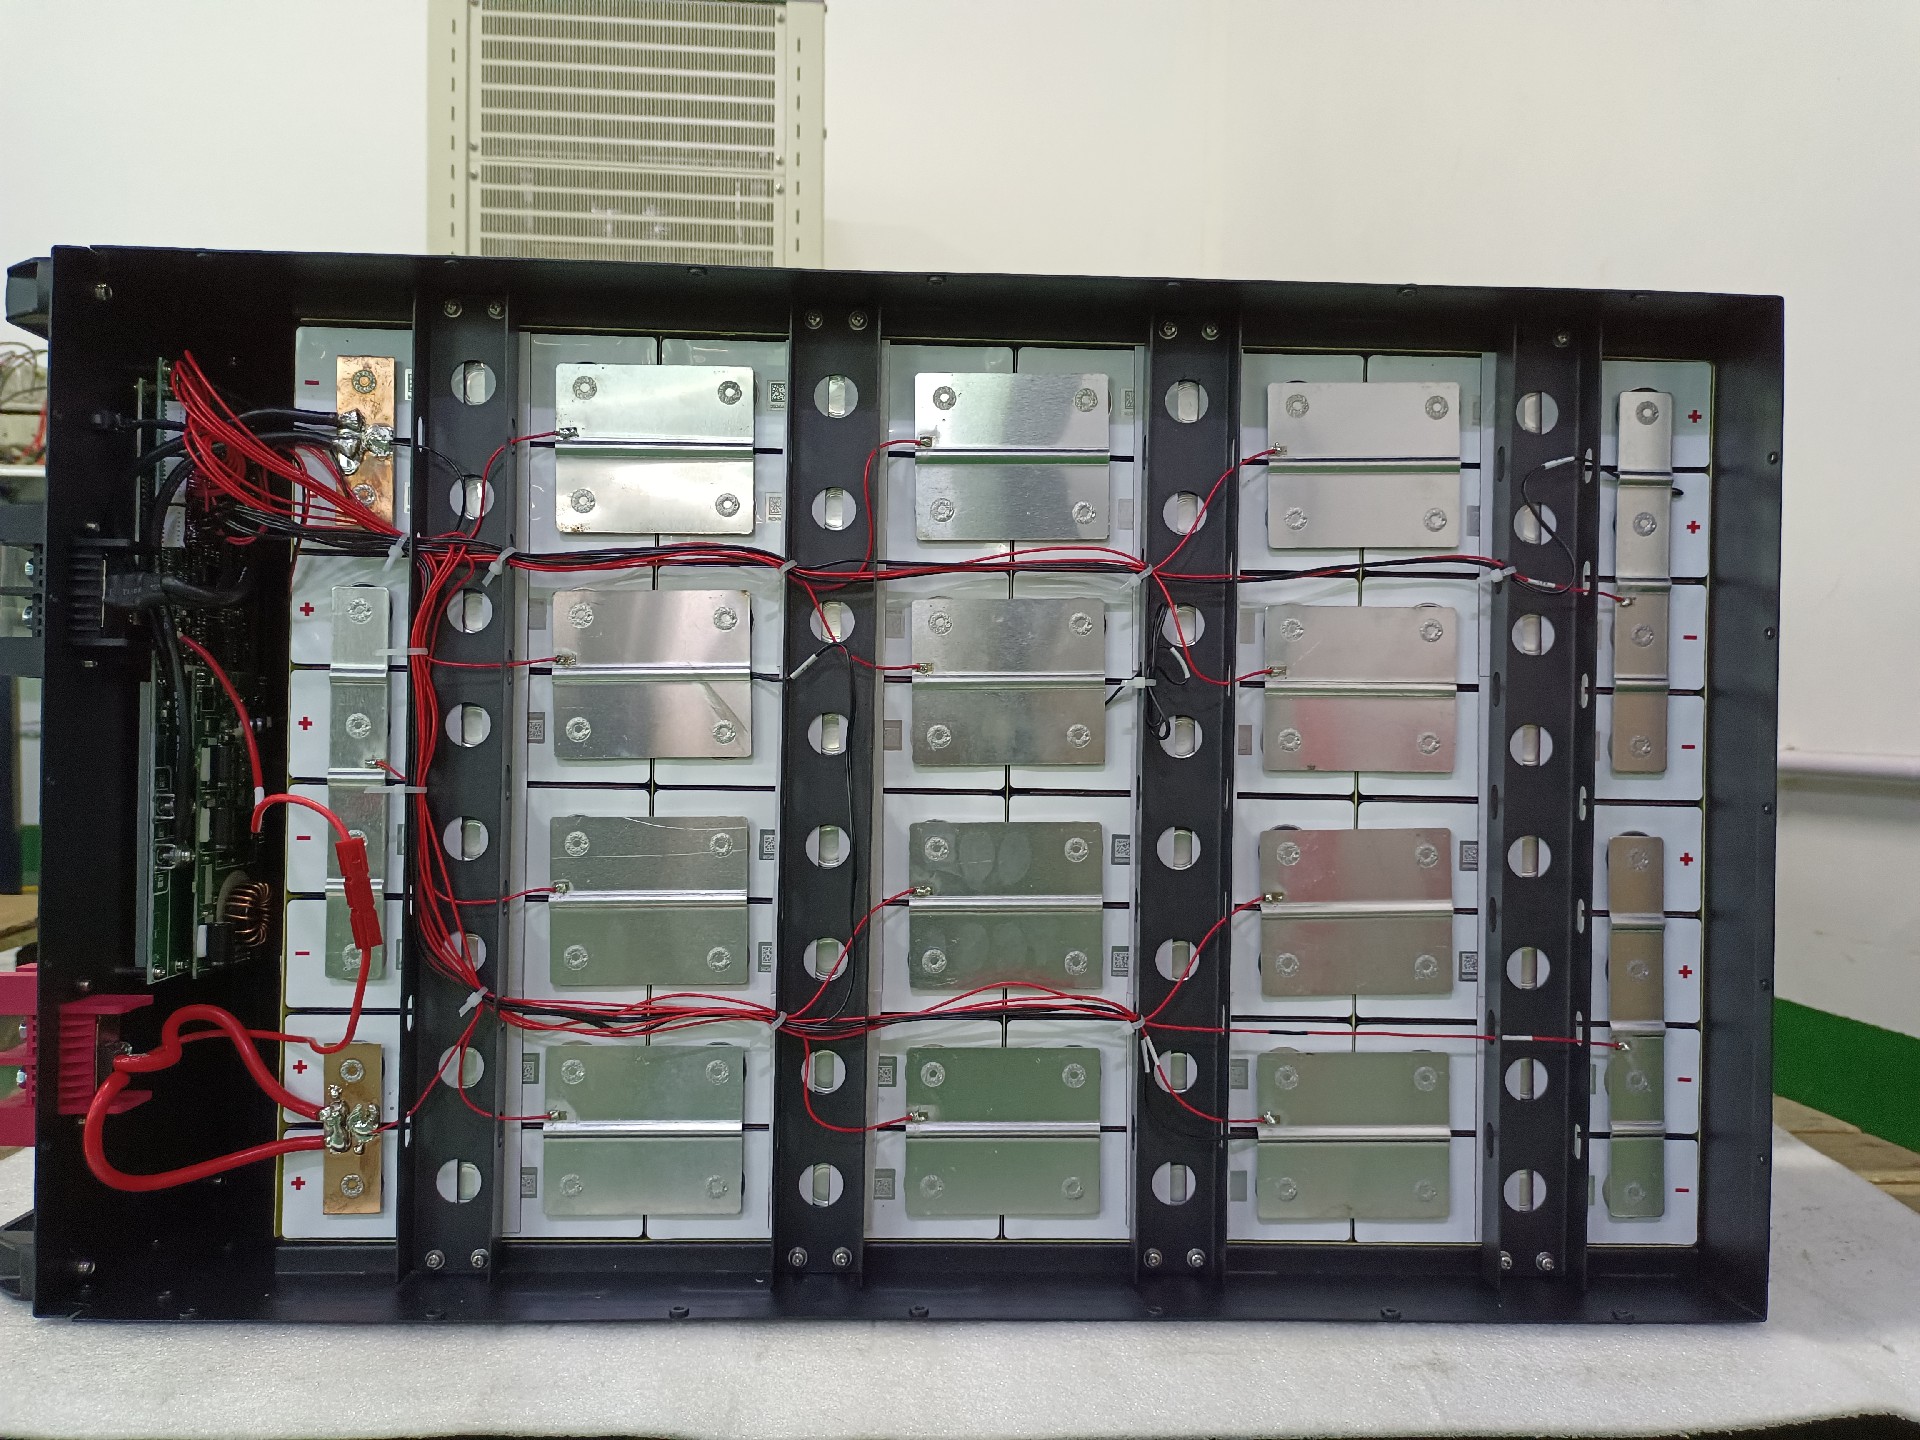
Packs in Parrallel
Please do it in this way when you take 2 ~16 battery packs to work in parallel :
Connect the battery pack in the follwoing way
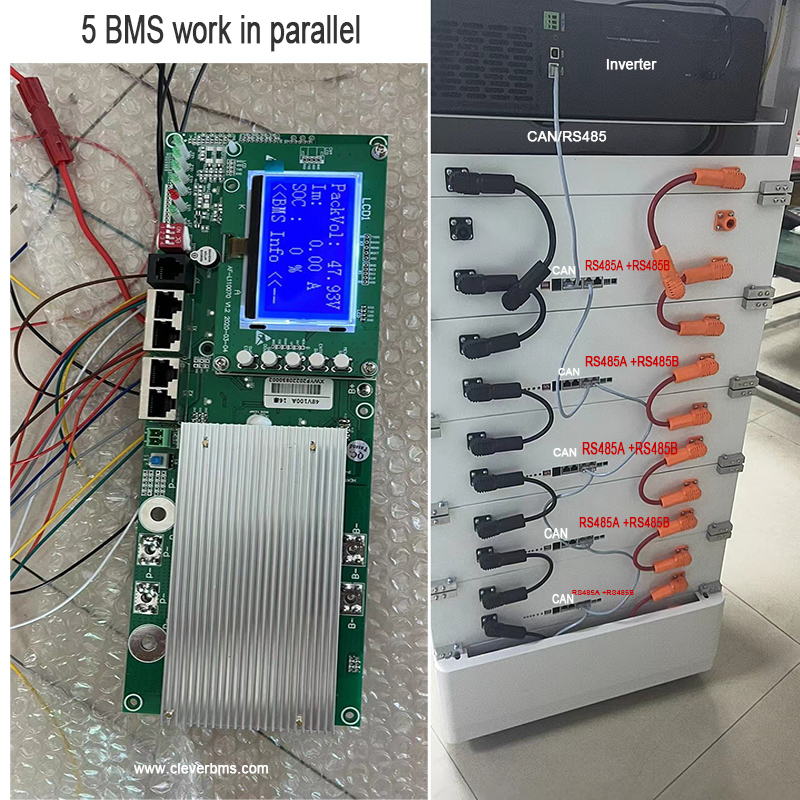
Go to PC Software and check the setting to make sure RS485 address to be Zero